Take that brush tool out and start drawing. The first 3 drawings are the easiest. Shoot them on 1s (meaning have them back to back on your timeline exposed for only one frame each).

Your first drawing should just be a small blob. Draw with the Brush, then fill it in (with a different color if you wish) with the Paint Bucket.
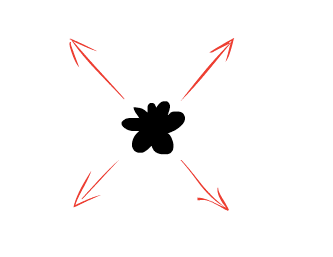
Activate your onion skin move the range finder to only include the previous drawing. Smoke as simple as this one works well by animating "straight-ahead".
 Smoke as simple as this one works well by animating "straight-ahead".
 Sometimes I key out some bursts with a key drawings just to see where I'm starting and where I'm going as I build the general shape of the form, otherwisem animating frame by frame usually works. Press F7 to make a new blank keyframe, and with the Onion Skin ON, draw the new expanded shape of the smoke cloud.
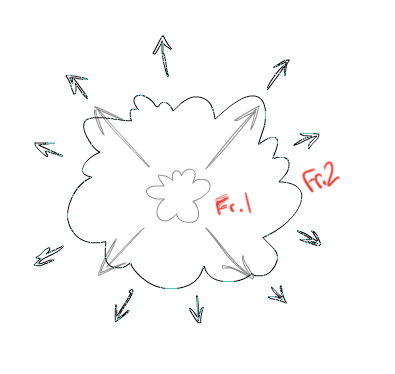 Below is the 2nd frame, covering a lot of distance to show the long spacing between the drawings (as shown above). The initial expansion is huge, after these first 3 drawings (on 1s).
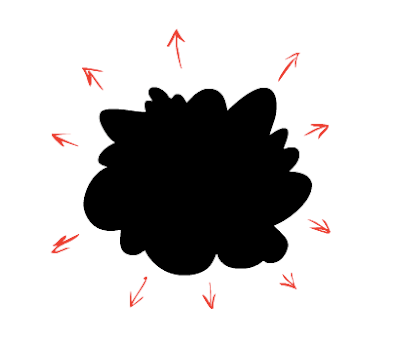
Then the 3rd drawing reaches quite large and now from this point forward we can animate on 2s.

Your first 3 drawings overlapping each other should look something like this.
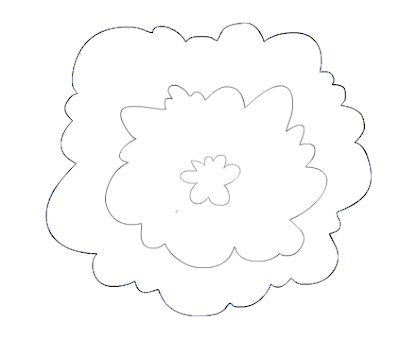
On the 4th drawing the spacing between our drawings (for the outer edge of the cloud's form) is very tight, making the outer rim of the smoke move slowly (all on 2s from now on). Always working with that Onion Skin activated, drawing the outer edge of the smoke cloud is very easy simply trace over top of your previous drawing (on your new blank key frame at frame 4). The spacing between your drawings (for the outer edge) will now always be very small, so as you trace over you're gradually expanding the outer rim of the cloud's shape more and more every frame. The closer you draw over top of the previous drawings position the slower the cloud will expand. Draw with the Brush then fill it in with the Paint Bucket, frame by frame.
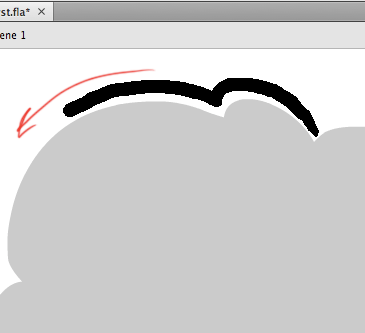
Also on Frame 4 you need to start the smoke's break up pattern. Start off with a hole in the middle, this hole will initially start off fast (sort of like how the overall form of your smoke cloud did for the first 3 frames).
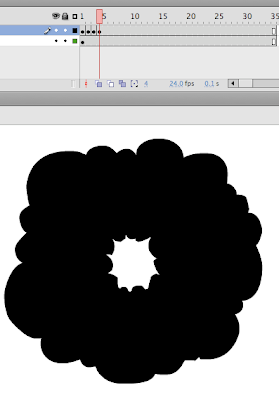
So here's a slow motion version of what you should have so far, with some notes along the way:
That was easy, now as we get closer to the end it gets to be more tedious, but the more time you put into it, the smoother it will be. As you get gradually expand the inner hole closer to the outer rim, you have to start making decisions as to which chunks will actually form when you run out of room and are forced to begin breaking peices off, all the while the entire cloud shape is ALWAYS slowly expanding outwards. As you can see below, you can barely see my Onion Skin is ON and I can see the previous frame as I draw the ever-expanding inner hole - no jokes please : )
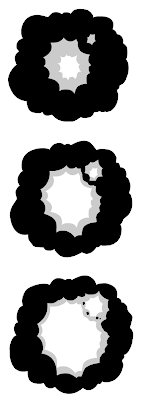 I decided to make a small secondary hole too, and within the next 3 drawings had that merge with the larger primary gap puncturing through.
Now frames 12, 14, 16, 18, and 20: the inner gap is catching up with the always-slowly-expanding outer edge (click image below to enlarge).

My smoke cloud here turned out to be more circular that I had hoped, to make it look more natural (even though it's a quite cartoony design) would be to add more randomness to that outer shape of the smoke cloud, but this will work OK. The last 5 drawings now are for the donut-shaped cloud to continue dissipating and breaking up into nothing.
Zoom in close, moving around with the spacebar, and keeping that Onion Skin on you go frame by frame, F7 to make the new blank keyframe , then start drawing the donut shape breaking apart. Keeping track of each little bit can be difficult, but the more consistent you keep it and the more gradual you slowly break the peices up, the better it will look in the end.

When you get down to the last 2 or 3 drawings, you have to decide which tiny bits are simply going to "pop off" and which larger clusters will have to change on for a few more frames as they slowly shrink and dissolve away.
My timeline looked like this when I was done, drawing on every second frame after the intital burst out.

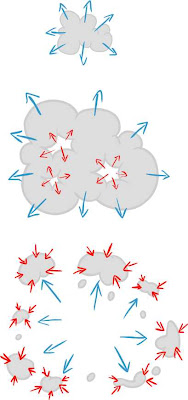
Remember, a fast initial blast out, then a gap (or multiple gaps) expanding outwards from the core, to eventually meet up with the ever-slowly-expanding outer rim, until you only have tiny bits breaking apart and shrinking into nothing.
Here's more samples using the same theories:
Hope this was helpful.


No comments:
Post a Comment